I'm travelling into a new way of working, a new country, a new language, and a new hobby which I'm passionate about. Come with me for some of the journey...

Friday 25 August 2017

Feeling a little sombre

Hello all... I've been having a weird couple of weeks, feeling about as grey as the weather has been.  Not actually ill, but not quite up to par; restless, unsettled, and unable to get anything constructive done - especially at the craft table.  Things just kept on ending up in the bin.

Then the Simon Says Stamp Monday Challenge offered up Artist Trading Cards as the theme.  I love ATCs (I still miss the Fun With ATCs challenge where I was on the design team until it stopped running), and they're really small, so I decided I must be able to manage a couple of 2.5 x 3.5 bits of crafting... and I did, but the grey mood made its way onto the craft mat, so it's a sombre little set of ATCs I have for you today.


And there were still stages during this process where I nearly gave the whole thing up in disgust.  So I thought I'd share some of the struggles along the way... maybe it's useful to know that it's not always all plain sailing around here!


Things kept not going according to plan, and nothing pleased me, but I tried to embrace the discomfort and push on through, and somewhere at the end of it I managed to make my peace with them.


I think they do reflect a truth about how I've been feeling, so that's something, even if its not the most cheerful of destinations.


I started by gluing scraps of book page across the top end of a piece of A4 manila craft card.


I gave that a watery wash of gesso and scraped on some Watercolour Ground with a palette knife for texture.


Next step was a good spritzing of Pumice Stone Distress Spray.  You'll see mine's taken on quite a greenish tinge, but I don't dislike the green-grey tone.


Hang on... Time Out - I'm lying... that wasn't the very next step.  There was a whole mess in between.  I tried some wrinkle-free distressing with lots of greens - ink and Oxide - and hated it completely.

I rinsed away as much as I could, but it took a good coat of Snowflake Fresco paint to completely cover it up - and then I was cross because I'd lost all my book text.  They almost went in the wastepaper basket, but this was where I decided I couldn't put another thing in the bin.  I had to push through...


So I cut my three ATCs from what I had.  The last one was so wonky I nearly dropped down to just a pair...

I mean, this is how it's been - I can't even cut straight lines at the moment!  But I stuck a bit of chopped off card back on to even it up, and carried on.


That cobbled-together edge determined the next step... I thought some tissue tape would disguise it quite well, so all three ATCs got a nice strong column stuck down along the edge.

If you look closely, you'll see the extra stuck on card under the Paris postmark over on the right!


It's not how I would usually use tissue tape.  I prefer delicate shreds of the stuff, but desperate times call for desperate measures.  (Okay, even I can hear that's a little melodramatic for the situation at hand!)


And, having done it, I started to be less cross about the whole process and a little more interested in where to go next...


... though still far less decisive than usual.

I hadn't even managed to decide on the orientation yet - portrait or landscape.


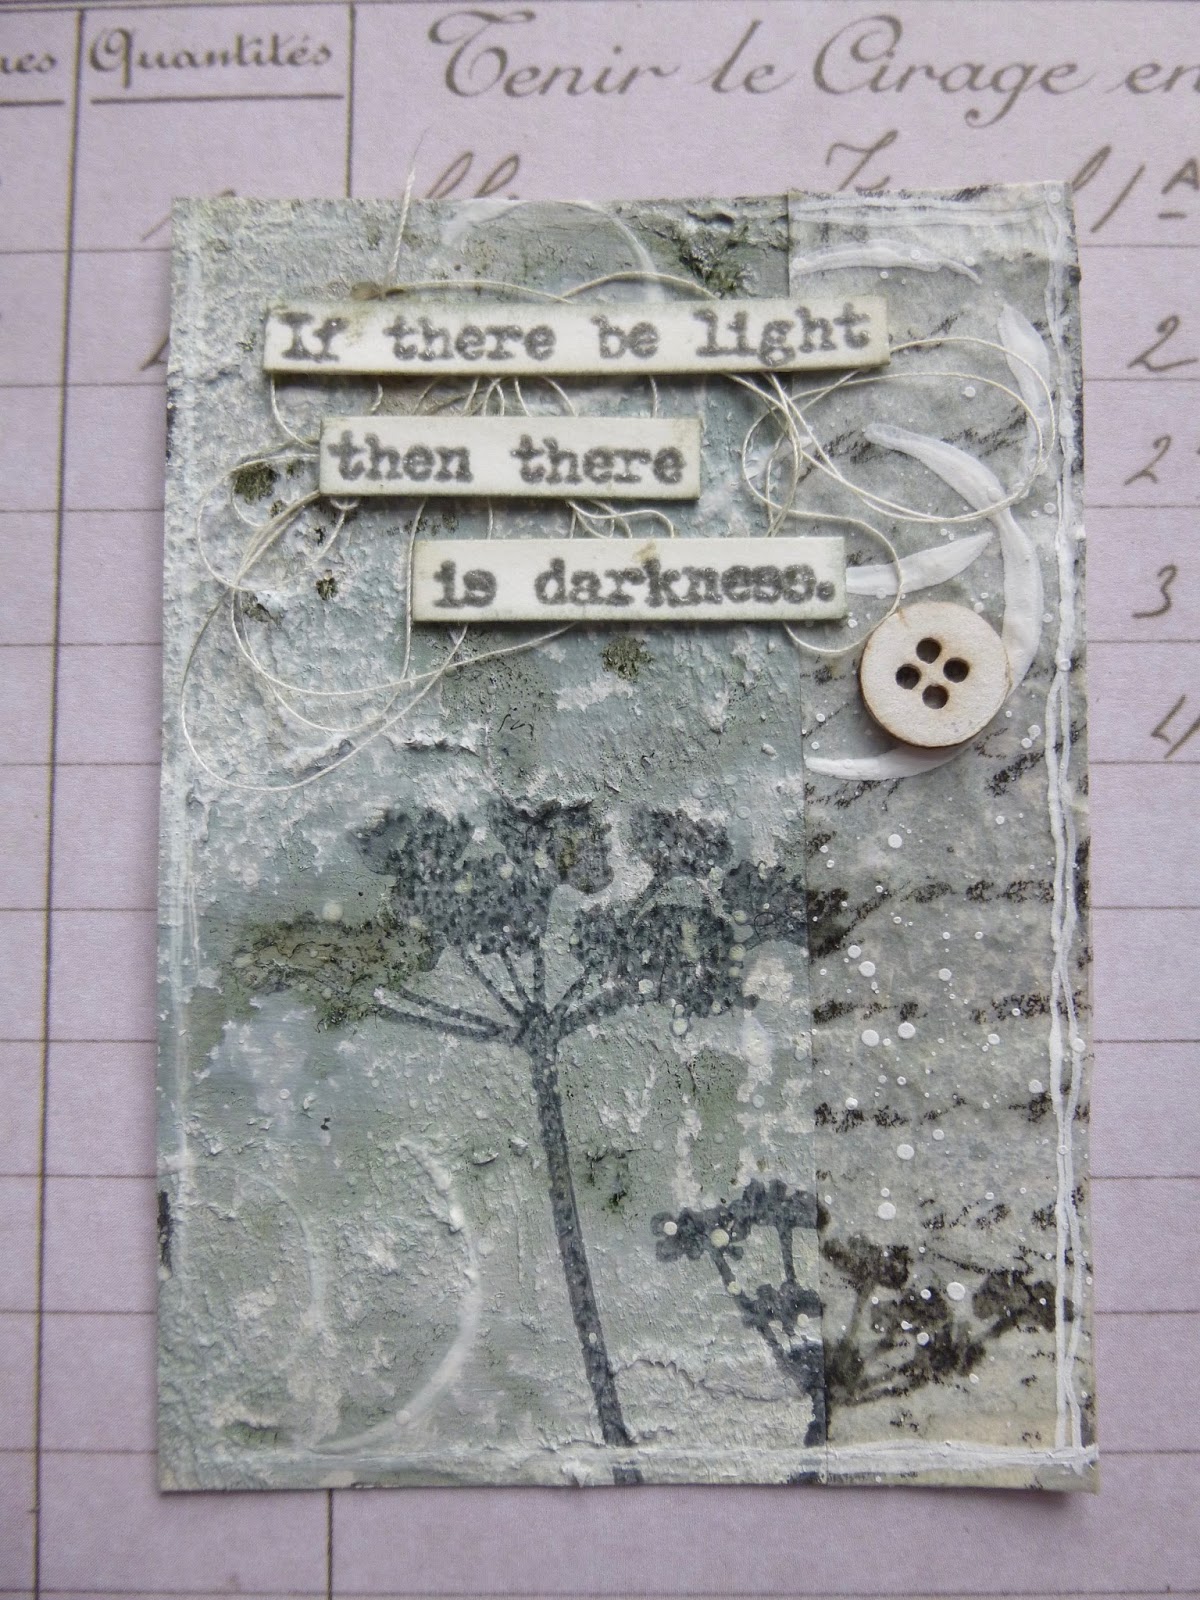
I needed something to make me happier so I reached for meadow flowers - the Tim Holtz set of Wildflowers silhouette stamps - and stamped my favourite in a slightly different position on each ATC.


I used Watering Can Archival and - for the first time - my stamping platform.  Just as well I did... over a textured surface like this, it's fantastic to be able to go for a second stamping to get the full definition.


And things definitely started to look up when I added some lid-stamping with gesso (large circles are done with a Distress Paint lid, smaller ones with an alcohol ink lid).


But I hit another delay at that point and pottered around for a long time trying all sorts of possible embellishing, discarding idea after idea in disgust.

I settled on the messy thread quite early on, but couldn't quite work out what else belonged there.  I nearly left them just like this.


I knew I wanted words, but resisted - at first - the idea of using the same quote on all the ATCs, even though they were the words calling most loudly to me.  It's the Pythagoras quote from my EAB02 Darkness and Light set.

So in the end I yielded and stamped it three times in Watering Can.  I clear-embossed them and trimmed them, but they were too blockish in the full form, so I started to trim them again.


As I was slicing them up, I was arguing with myself about where to make the cuts - speaking the words out loud to hear the difference - and found that I actually quite liked having the variations...


According to where you split the phrase, it slightly changes the emphasis and therefore the precise meaning.  Go on, try them out loud with the different phrasing - I dare you!


Of course, that tickled my word-head no end - these are the things I make my living out of! - so I decided to let it play out on the ATCs themselves, so they each play with the phrase slightly differently.


The simple wooden buttons provide an echo of the lid-stamping circles in the background...


... and I finished off with some doodled white pen frames around the edges.

In the end, those strong stripes of tissue tape have softened into the background...


... and I do love the textures here, so that, although I wouldn't say these exactly make me happy, they do somewhat soothe my soul.  And it certainly made me feel a bit better to have got something finished.


Thanks for putting up with my small helping of sombreness and my stop-start process on these ATCs.  It may feel like there are lots of process photos where not very much seems to have changed... but that's exactly what it was like trying to get these done.  I kept getting stuck and having to really battle for the next step.  But I am glad I persevered.


I hope you all have a lovely weekend.  I'm off to visit friends, so hopefully that will reset my internal mood and I'll be back next week full of inspiration and delight.  Happy crafting all!


I'm offering these up for the Artist Trading Card theme at the Simon Says Stamp Monday Challenge
At Mixed Media World they have Anything Mixed Media with a Moodboard - in the mood I'm in, my eye went away from the brights to the soft green greys of the picture at the bottom right of the board, with flower heads against the sky
Anything Goes at Emerald Creek Dares, so I'd like to play along there too

It doesn't matter how slowly you go as long as you do not stop.
Confucius

Saturday 19 August 2017

Cabinet Journal


Hello all!  I'm so glad you enjoyed the Candlelit Foliage.

Today we're back on the journal trail, another creation made using Eileen Hull's fantastic Journal die.  You saw a sneak peek of this when I was joining in the announcement of the Journal Treasury e-book the other day. 

(If you missed the exciting launch do check out all the details by clicking the link.)

The cover looks innocent enough, ready to open up to reveal the pages inside.


But this one has no pages.  It's a journal with a difference... a cabinet of curiosities, lost and found over time.


One of the inspirational journals included in the Treasury comes from the fantastic Shelly Hickox a.k.a. the Stamptramp.  She used Tim Holtz Configurations boxes inside her journal cover... but, even before I'd seen that, my very first thought when I saw the journal die for the first time was, "Ooh, that looks just the right size for a Calico Craft Parts Printers Tray... and it turns out I was right!


I've played with the CCP Printers Tray a number of times (check out my Springtime Shadowbox, or the Doll Exhibition, or even, from way back when, you could do some Beachcombing), and I love that you can get it with varying internal configurations, according to what you want to do with it.


A recent new addition to the range, though, are these wonderful frames to add to the front of your finished tray to give it a really polished look.  As you can see, I haven't added it to the tray itself, but it makes for a lovely feature on the front of the journal.


This is the plain frame, which I've given a rusted look with the simple aid of a few DecoArt Media Fluid Acrylics, but there are also some glorious decorative ones.  I've got a lovely bramble-covered version which I'm looking forward to playing with soon.


The word label is also by Calico Craft Parts, one of their new(ish) Word Elements.  Again, I've just used some paint to get the rusty look - some Quinacridone Gold, Paynes Grey and Raw Umber.


I layered the paint in washes, stippling it until I had the look I wanted.

Behind the Word Element is a piece of my much-loved rusty mesh, and some tiny paper roses finish the front cover.


The outside of the journal is covered with some of the Tim Holtz Memoranda papers - in fact, those are the papers in use throughout, including on the outside of the printers tray itself, which forms the edging of the "pages".


And some plain off-white cotton twill tape provides the fastening to secure it.


I've kept it relatively simple on the outside, since I expect it's going to stand open as often as it is closed...


... so that you can explore the Lost and Found objets trouvés inside...


... the gatherings and remnants of a number of lives.


The brilliant thing about the Printers Tray is that it comes in pieces, making it really easy to decorate it before you assemble it.


I've used the 6x6 papers for the interior.   (The central walls aren't stuck down yet at this point - I'm just checking how it looks.)


The 6x6 designs are smaller in scale, so they don't overwhelm the little cubbyholes.


The larger scale 12x12 Memoranda papers cover the inner boards as well as the front of the journal.

I love that it looks as though I've taken the time to gather lots of old vintage ephemera and papers and even old sellotape - no, it's all on the paper design!


I painted the inner spine, as you can see; and later I added some vintage lace to match the pieces in the cubby holes opposite.


There are lots of bits and bobs in here, some of which have been waiting around for quite a while to find a new home, each one a "found object" as the sign says.


There are some that I've altered - these wooden cubes, covered in some more Memoranda papers...


... and some that I made pretty much from scratch, like this bottle top filled with paper, mini-gears and topped up with Glossy Accents.  I made it ages ago - it's been waiting at least three years to be used for something!


I'm completely in love with the new Idea-ology skulls - incredibly detailed and brilliantly aged.  All you have to do is stick them down and they add antiquity and mystery.

He's next to a resin rose which I rusted pretty much exactly four years ago (my Tea Dye and Rusty Hinge post will reveal all...), and a rusty star which came that way.


The golden bird I think came off a charm necklace bought at a charity shop for crafty dismantling, and he's flying over a resin picture frame - maybe Prima? maybe not.


There's another of the frames, and another rusty star (somebody must have been making a collection) in the top left corner display.  You'll see I distressed the papers even more round the corners and edges.


Just below the Quote Stick (which gave me the idea behind the whole piece), a couple of spools sit on some more of the lace with a couple of faded roses, carrying the memories of some long-forgotten romance.


Tucked away in a corner, there's one of the Idea-ology Salvaged Dolls, messed up considerably with washes of paint, perched on another of the wooden spools.


And the key (from another long-ago rusting session) keeps its secrets - we'll never know what lock it opened... perhaps one on a small chest containing the love letters from that faded romance.  Since the key is lost, the chest can't be opened, so the letters will never be read again.


The innards of an old pocket watch hang on the wall, supported by a twist of rusty wire.


Down at the bottom left, the decorations are a little less steampunk and a little more baroque.  The gilded cherub perches on his wooden flourish (Calico Craft Parts again)...


... while the rusted locket, fallen into decay, commemorates another long-lost love.  Such a profile!

As you'll have noticed, there are several of the wonderful Clippings stickers dotted around.


There are more of them over on the inside cover of the journal.

Facing all those long lost dimensional objects, we also have some lost and found paper ephemera...


... the photos slipping through time...


... along with luggage labels, and tickets, and playbills, and school reports...


... and the memories and echoes of conversations...


... all the tiny pieces which go to make up the record of a life...


... and most of which slip away from us, carrying the stories they hold off into the world.


The whole thing stands up beautifully making it easy to display... now I just need some space.

So there's my journal cabinet of curiosities for you - I hope it sends your imagination off down as many story avenues as it does mine!

Hope you're all enjoying a great weekend, and I'll see you again soon.

Memory is the cabinet of imagination, the treasury of reason, the registry of conscience and the council-chamber of thought.
Giambattista Basile

I'd like to play along at the Mix It Up challenge blog where they are playing Anything Goes with an optional twist of Paper Piecing.  No paper piecing, I'm afraid, unless my wooden cubes count, but this is more design paper than you usually find here at Words and Pictures